
IoT kit to Send a Temperature alarm via Thing speak by using Micro:bit
Really I will not go to identify the IoT since millions of website already did. So we were using this Kit with our Project, which comprised of IoT:bit and many sensors , while the IoT:bit is an expansion board based on IoT for microbit, it can support the sensors in 3-pins, the actuator and the buzzer, it can also give a specific time telling even the microbit powers off with the RTC onboard.
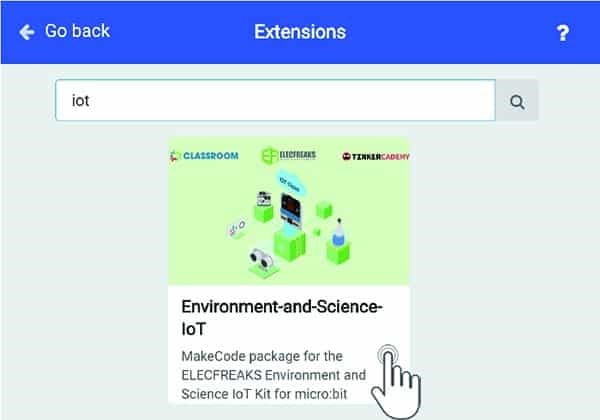
So first we have to prepare the IoT Kit and the Microbit, then start with writing our code by using https://makecode.microbit.org platform, and in order to do this, we should prepare our coding base by adding the required Extension as following
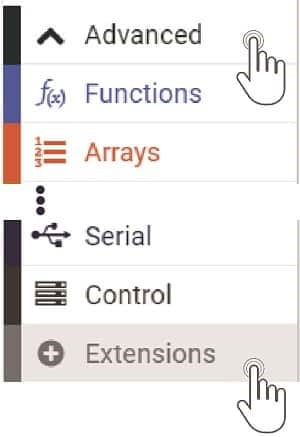
We need to add an extension for coding to the IOT. Click on the “Extension” at bottom of coding drawer, then Search for “IOT” and click on the IOT package to add it to your project. (As below picture)
So, since we are talking about IoT, we should find a way to send our Data to the Cloud, thus we will need a Connection to the Interest, and luckily the IoT:bit equipped with our requirements . and most important function of IOT:bit is The onboard ESP-12F WIFI module which can connect WIFI and send information. To be used later for communication with the microbit and send the acquired data to the internet, (The pin RX-P8,TX-P12 is special for IoT) and we will see this soon with the coding.
And Here is our first step of coding with Microbit and connect it to the internet and first integration with ThinkSpeak platform.
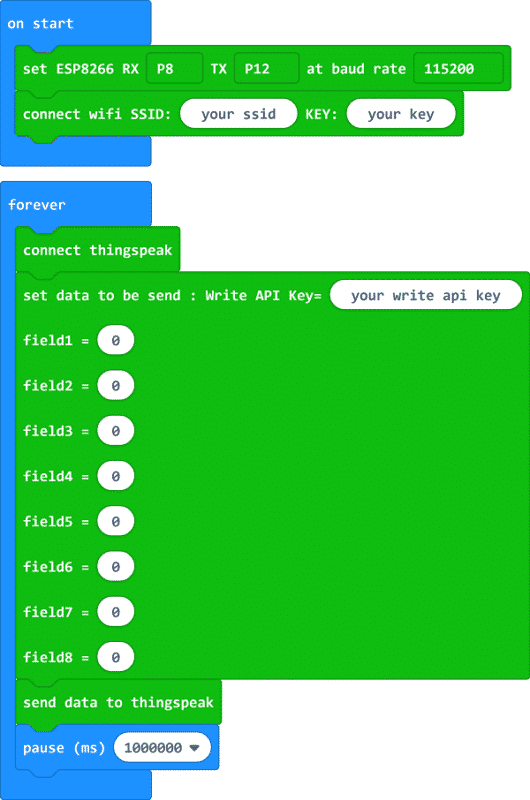
Simply add your WiFi name and Password, and then you have to create account in Thinkspeak, (I’m expecting they will accept only Work emails) not the personal email like yahoo or gmail Emails, not sure if this will be changed soon, I hope so.
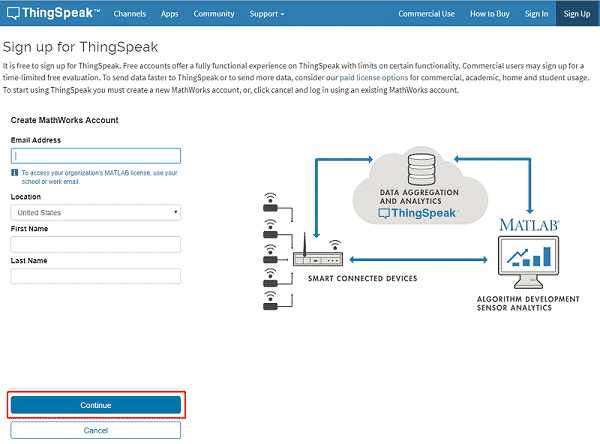
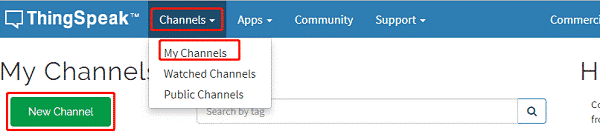
After you created your Account, we have not to create our First Channel in order to send our acquired Data like Temperature, Humidity … to be collected and visualized on Thinkspeak.
Click on “MY Channels” and click on New Channel for your new project.
Honestly, it’s very simply and nothing do here Except adding a Channel Name as you want, and a Field name as you want to be used later, and don’t worry you can add more Fields later, so you can start with one Field as a First Step.
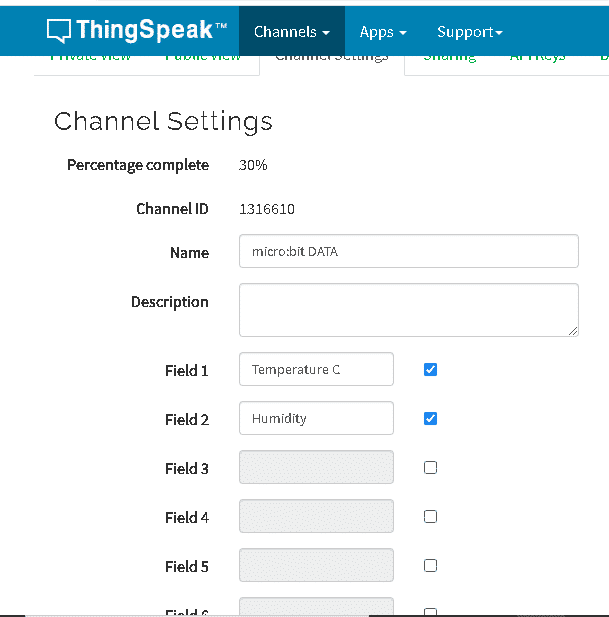
Then, click on save channel, and you can display your channel, but for sure we will not find anything since we didn’t start with Sending the Data to our new created Channel and we will do soon.
So, the question here is how to connect our Channel with our Micro:bit and Start sending our data to our new Channel?
simply the new channel will provide us with an API Key and we will use it with our code later in order to tell the Micro:bit to send the acquired Environmental data to our new created channel.
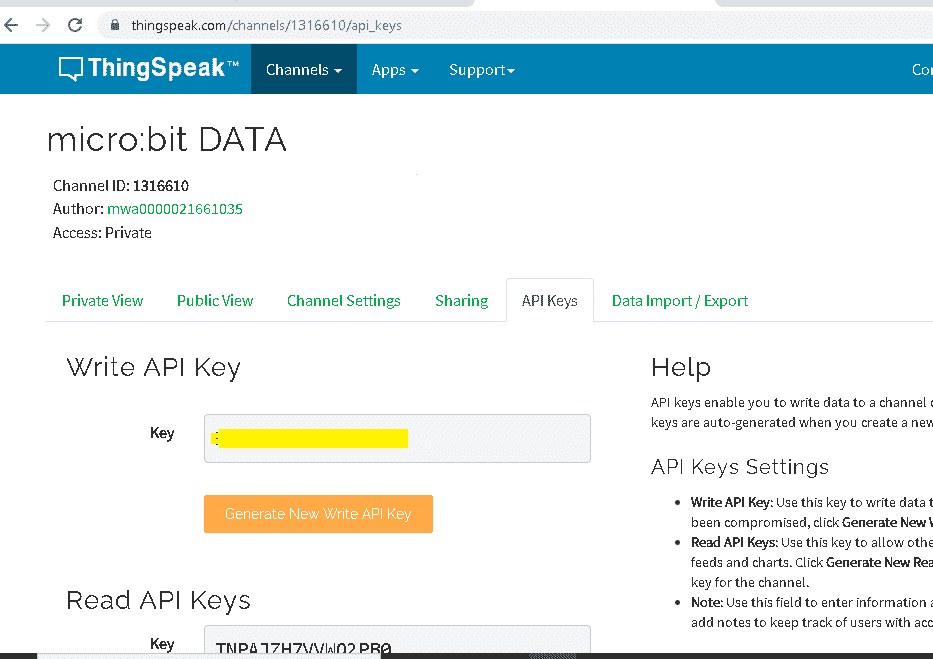
So simply go to the ApiKeys Tab in your new Created Channel and copy the Key that highlighted with Yellow,” I highlighted mine with yellow in order to not be used by mistake, so you have to use your own!)
And here we go, here is the Code and I’ve tried to make it simple as possible to start and you can edit or add more control as you want, this is working and you can enhance it later.
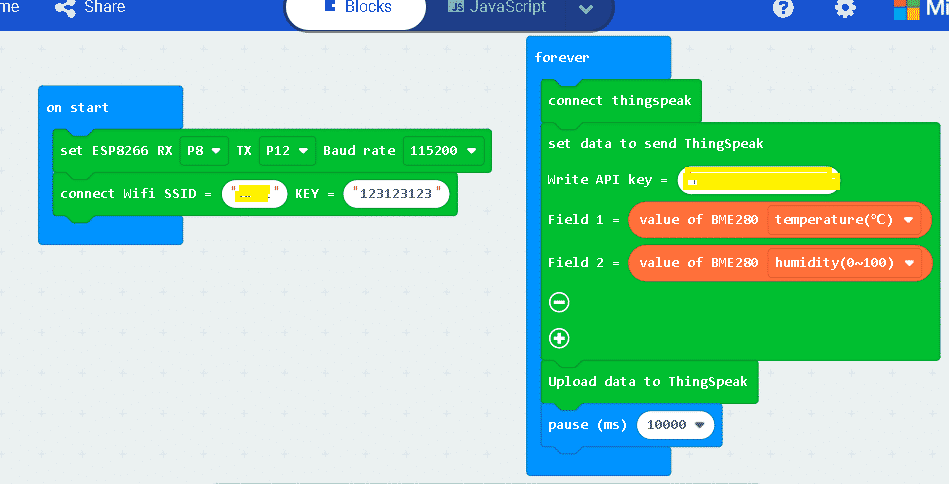
Just update your Wi-Fi name and password and the API key that you got it from your new Created Channel, and we are Ready to Go.
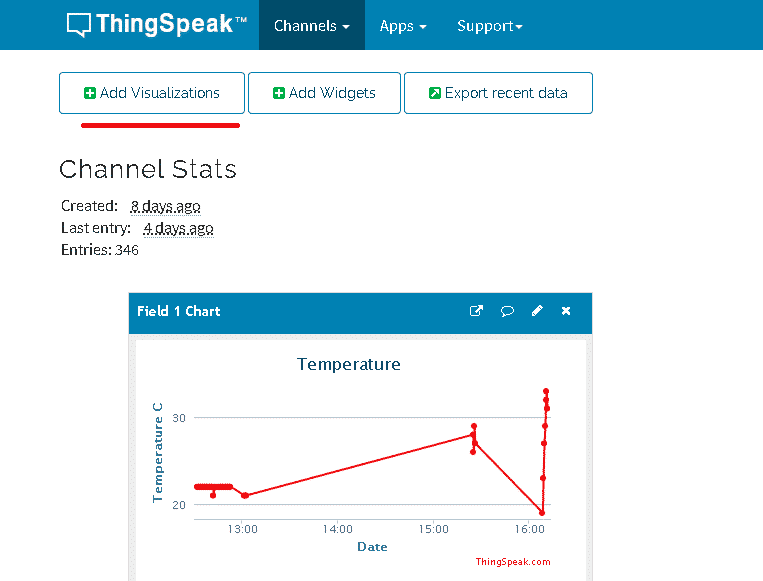
And here you can create your own visualization and start with Data Monitoring, there any many other Charts that you can use here for monitoring, you can try some of them.
- We have talked about how to use micro:bit to upload data to Thingspeak IoT platform. but so far nothing to take Action, only monitoring, so we are going to use another platform to send us an Email alarm when micro:bit temperature threshold value passed, so we are going to IFTTT, and for sure I’m not going to identify IFTTT because they already did very well, thus let’s focus on how to do it .
Shall I say we have to Register an IFTTT Account! it’s basics.

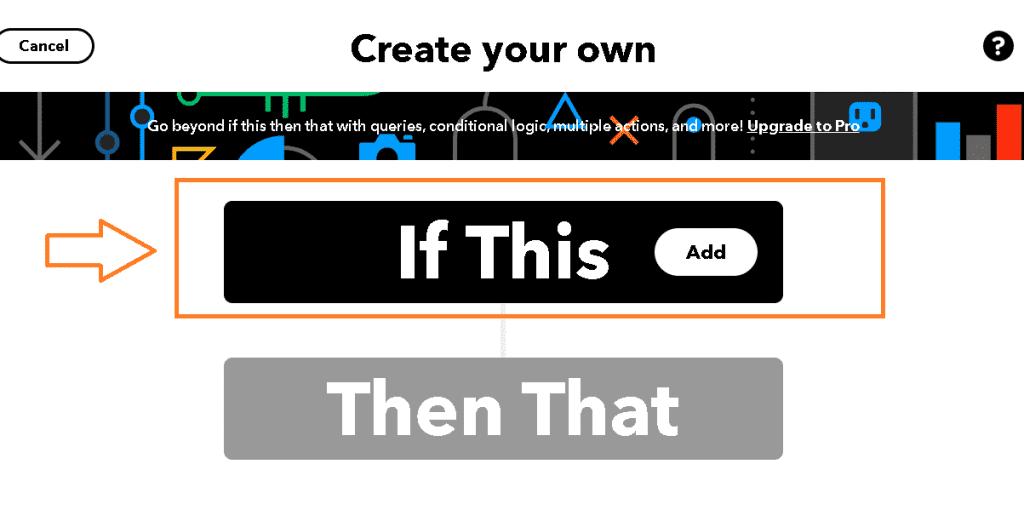
Now we have to create a new Applet! as simple as this.

Then click on IFTTT as following,
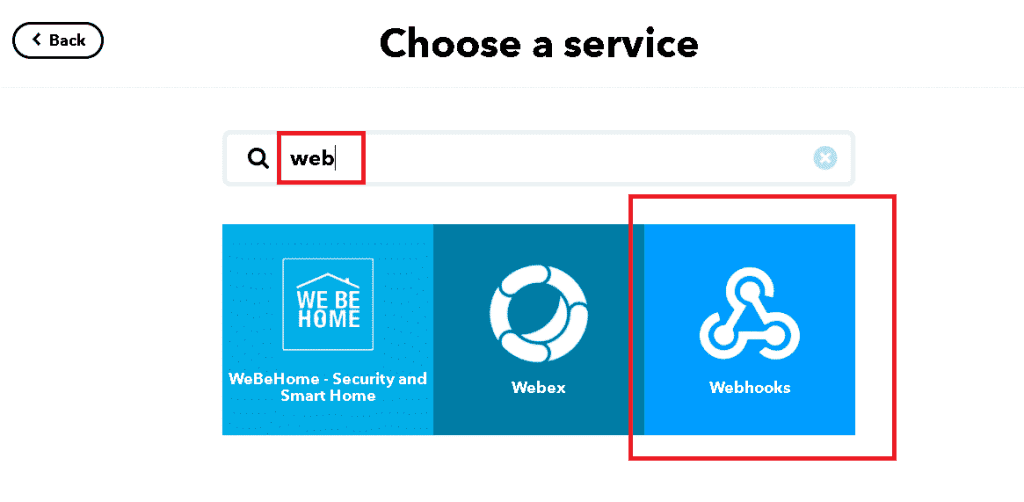
In the search we are looking for Webhook! so find it and click on it.
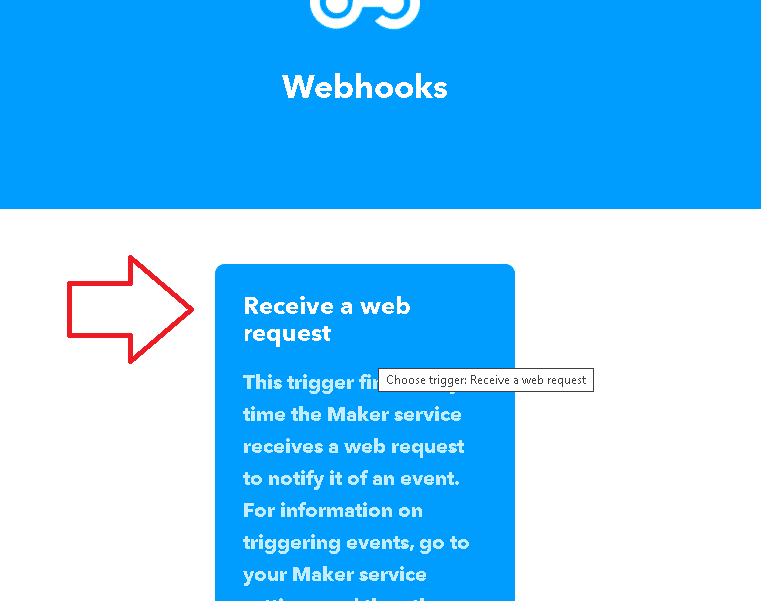
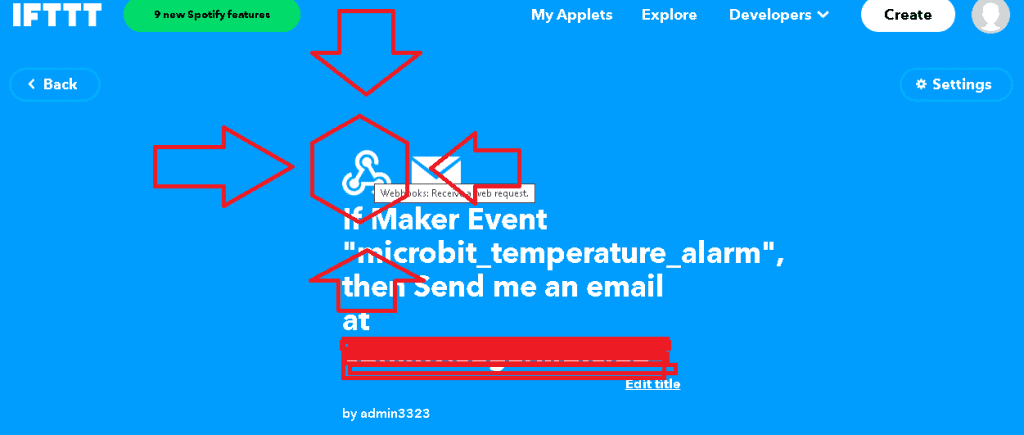
Then click on the “Receive Web Request”.
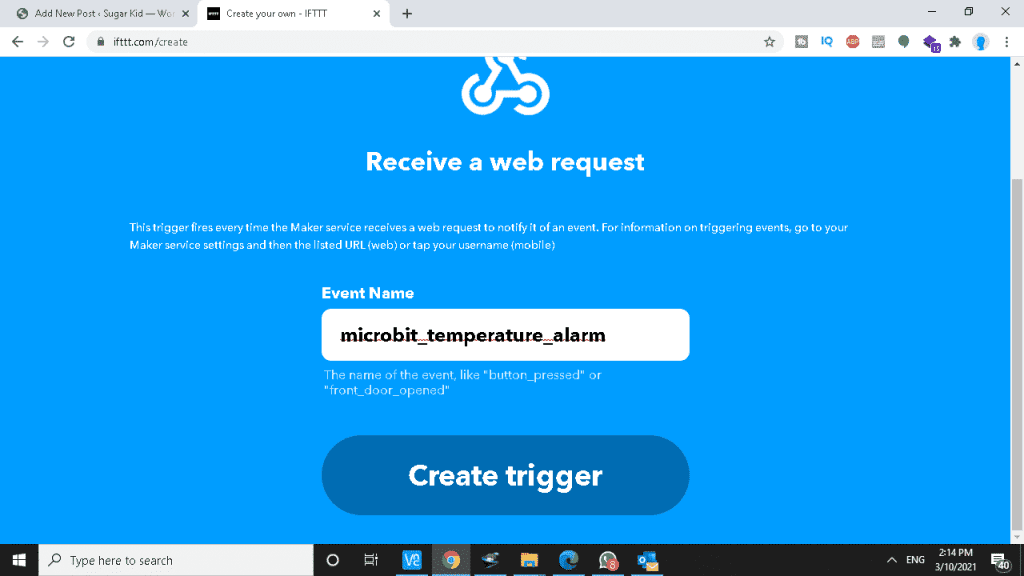
Add the name that you want, and for me I make it microbit_temperature_alarm.
now click on THAT.
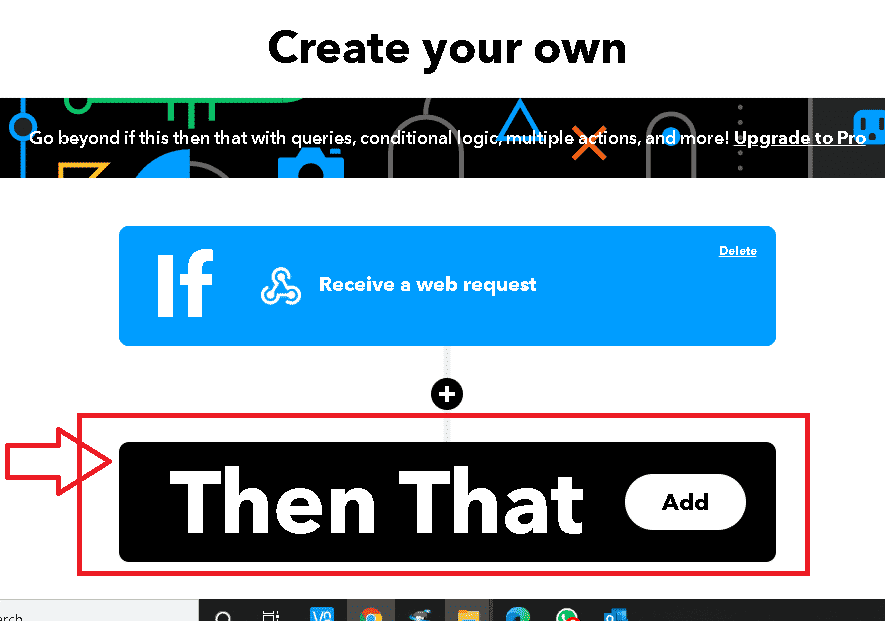
And search for the Email.

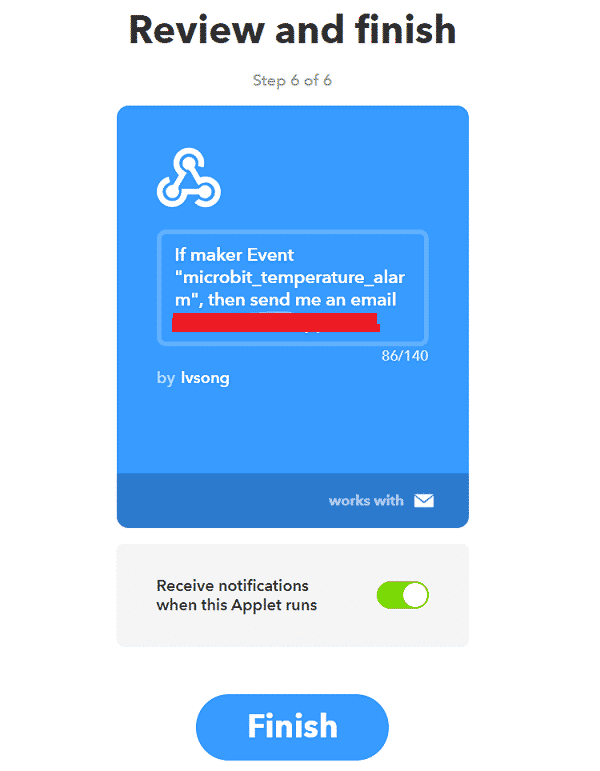
Add the email that you want to receive the Alarms on it.
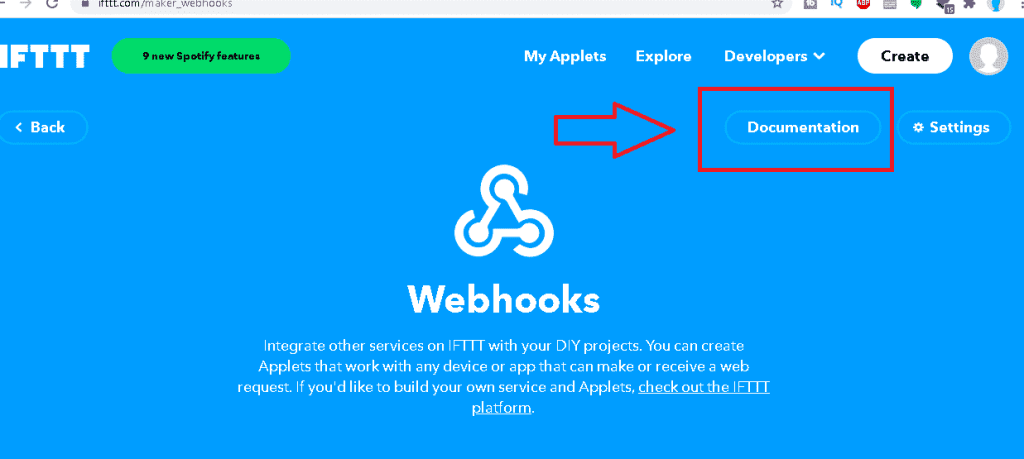
Now, we have an Applet ready to send an email, but how to connect Thinkspeak to IFTTT? Honestly I spent many time to figure out this, and here it’s for you guys, just click on the Webhook that you have created already in the previous steps.
then on the Documentation.
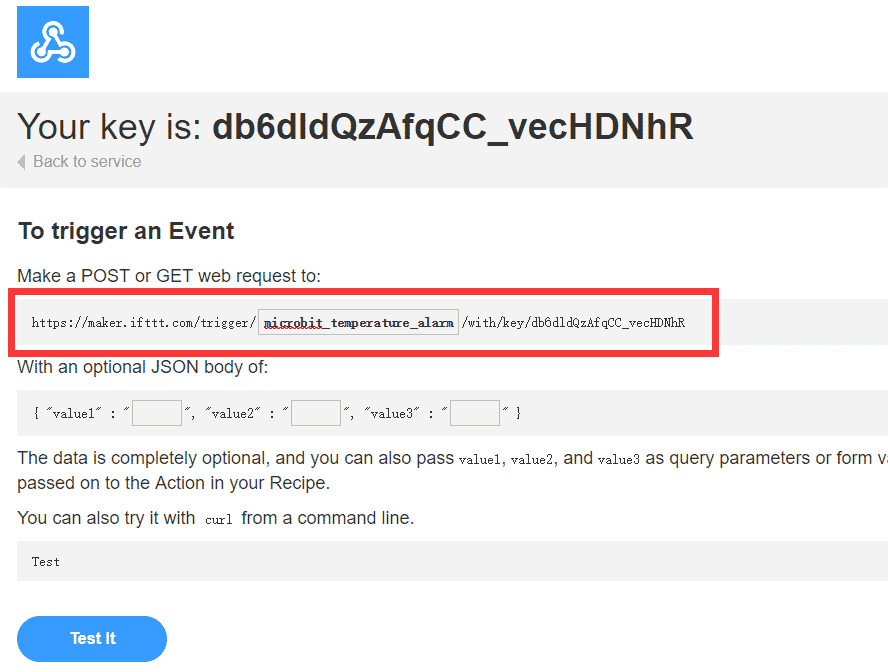
Here the IFTTT will provide you with the required Key.
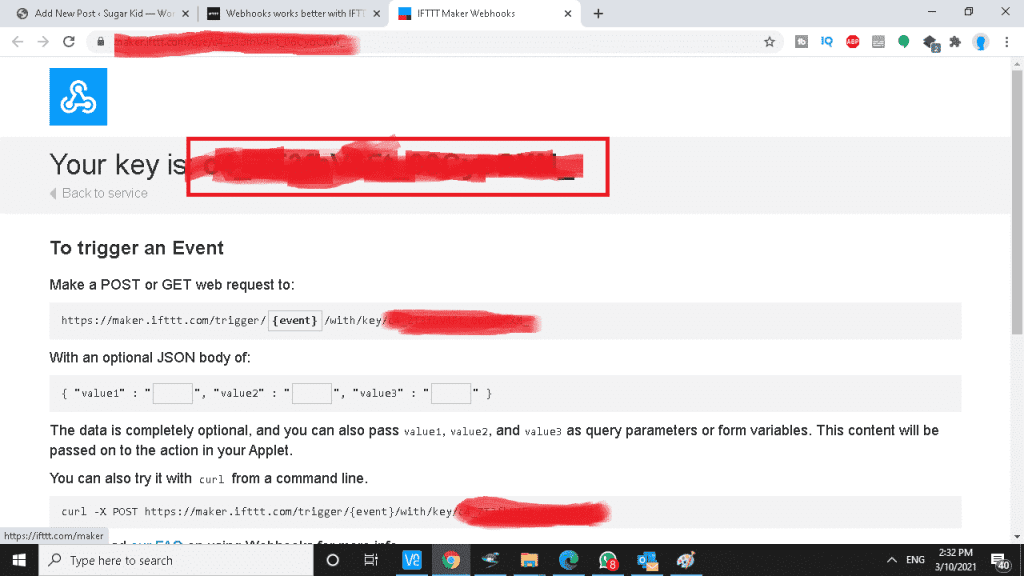
Now you will find the request and the API key just update the event with the event name that you write it earlier.
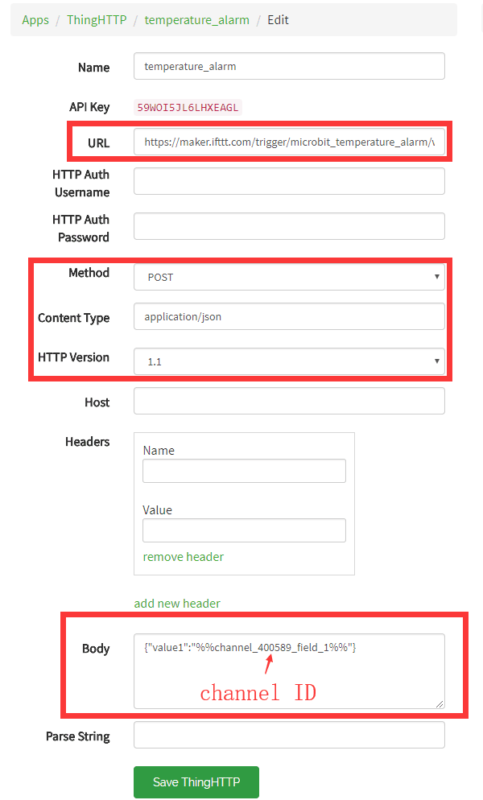
Now let’s get back to Thingspeak Setting, and let’s create our ThingHTTP.
Here’s the setting of connection with IFTTT, make sure to use your link in the previous steps and for Channel ID below, you can leave it empty and try it later no problem.
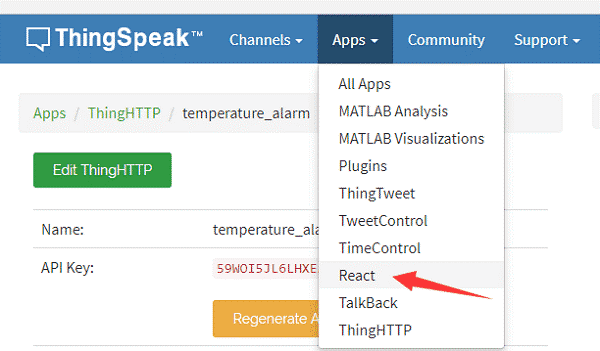
Now let’s create a React service.
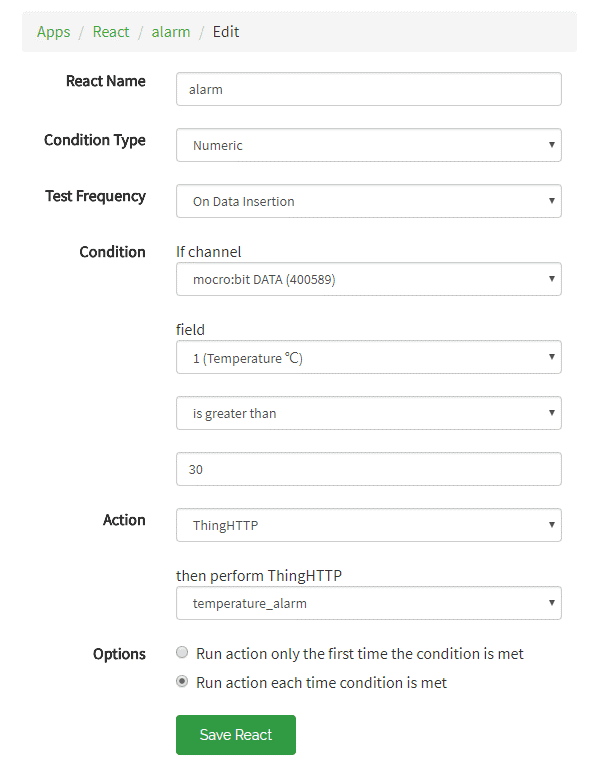
Configure it like following and according to your channel name and according to the Temperature that you want to receive alarm on it, for below picture it set to 30.
Check your email box and see if you have received an email from IFTTT!
and That’s it guy , and let see what we can create next !
Good Luck and please don’t hesitate to ask me anything.

TheNextGen
Arm your child with the power of Coding & Mathematical Thinking!


Subscribe Now
Don’t miss our future updates! Get Subscribed Today!
Erbil, Gulan st, Nirgiz Palaza, 3rd Floor Irbil, Iraq 44000 Irbil, Iraq
+ (964) 7706930930
The NextGen, Copyright ©2022. All Rights Reserved.